451 lines
22 KiB
Markdown
451 lines
22 KiB
Markdown
<!-- PROJECT LOGO -->
|
|
<p align="center">
|
|
<a href="https://github.com/calcom/cal.com">
|
|
<img src="https://user-images.githubusercontent.com/8019099/133430653-24422d2a-3c8d-4052-9ad6-0580597151ee.png" alt="Logo">
|
|
|
|
</a>
|
|
|
|
<h3 align="center">Cal.com (formerly Calendso)</h3>
|
|
|
|
<p align="center">
|
|
The open-source Calendly alternative.
|
|
<br />
|
|
<a href="https://cal.com"><strong>Learn more »</strong></a>
|
|
<br />
|
|
<br />
|
|
<a href="https://cal.com/slack">Slack</a>
|
|
·
|
|
<a href="https://cal.com">Website</a>
|
|
·
|
|
<a href="https://github.com/calcom/cal.com/issues">Issues</a>
|
|
·
|
|
<a href="https://cal.com/roadmap">Roadmap</a>
|
|
</p>
|
|
</p>
|
|
|
|
<p align="center">
|
|
<a href="https://cal.com/slack"><img src="https://img.shields.io/badge/Slack-calendso.slack.com-%234A154B" alt="Join Cal.com Slack"></a>
|
|
<a href="https://www.producthunt.com/posts/calendso"><img src="https://img.shields.io/badge/Product%20Hunt-%231%20Product%20of%20the%20Month-%23DA552E" alt="Product Hunt"></a>
|
|
<a href="https://github.com/calcom/cal.com/stargazers"><img src="https://img.shields.io/github/stars/calcom/cal.com" alt="Github Stars"></a>
|
|
<a href="https://news.ycombinator.com/item?id=26817795"><img src="https://img.shields.io/badge/Hacker%20News-311-%23FF6600" alt="Hacker News"></a>
|
|
<a href="https://github.com/calcom/cal.com/blob/main/LICENSE"><img src="https://img.shields.io/badge/license-AGPLv3-purple" alt="License"></a>
|
|
<a href="https://github.com/calcom/cal.com/pulse"><img src="https://img.shields.io/github/commit-activity/m/calcom/cal.com" alt="Commits-per-month"></a>
|
|
<a href="https://cal.com/pricing"><img src="https://img.shields.io/badge/Pricing-%2412%2Fmonth-brightgreen" alt="Pricing"></a>
|
|
<a href="https://jitsu.com?utm_source=github/calcom/cal.com"><img src="https://img.shields.io/badge/Metrics_tracked_by-JITSU-AA00FF?logo=data:image/png;base64,iVBORw0KGgoAAAANSUhEUgAAAA4AAAAOCAYAAAAfSC3RAAAACXBIWXMAAAsTAAALEwEAmpwYAAAAAXNSR0IArs4c6QAAAARnQU1BAACxjwv8YQUAAACKSURBVHgBrZDRCYAwDEQv6gCOoKO4hOCXI9QVnEZwiY5iF5GaVClaBNtioCSUvCR3tMJaxIfZgW4AGUoEPVwgPZoS0Dmgg3NBVDFNbMIsmYCak3J1jDk9iCQvsKJvkzr71N81Gj6vDT/LU2P6RhY63jcafk3YJEbgeZpiFyc/5HJKv8Ef273NSfABGbQfUZhnOSAAAAAASUVORK5CYII=" alt="Jitsu Tracked"></a>
|
|
<img src="https://api.checklyhq.com/v1/badges/checks/5e048048-1b51-47ba-9209-60607507622e?responseTime=true" alt="Checkly Availability" />
|
|
<a href="https://hub.docker.com/r/calendso/calendso"><img src="https://img.shields.io/docker/pulls/calendso/calendso"></a>
|
|
<a href="https://twitter.com/calcom"><img src="https://img.shields.io/twitter/follow/calcom?style=flat"></a>
|
|
<a href="https://twitch.tv/calcomtv"><img src="https://img.shields.io/twitch/status/calcomtv?style=flat"></a>
|
|
<a href="https://calendso.slack.com/archives/C02BY67GMMW"><img src="https://img.shields.io/badge/translations-contribute-brightgreen" /></a>
|
|
<a href="https://www.contributor-covenant.org/version/1/4/code-of-conduct/ "><img src="https://img.shields.io/badge/Contributor%20Covenant-1.4-purple" /></a>
|
|
</p>
|
|
|
|
<!-- ABOUT THE PROJECT -->
|
|
|
|
## About The Project
|
|
|
|
<img width="100%" alt="booking-screen" src="https://user-images.githubusercontent.com/8019099/176390354-f1bc7069-0341-437a-9bb8-eb41092b4016.gif">
|
|
|
|
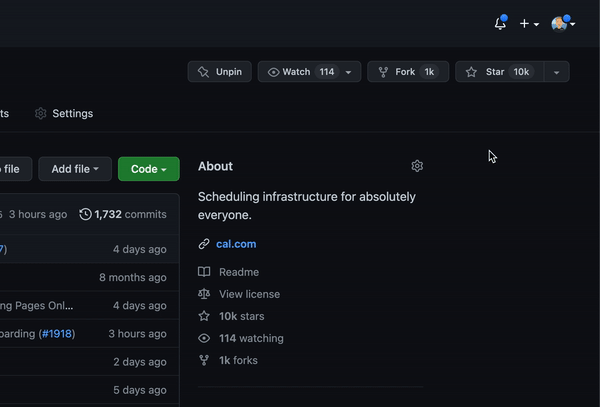
# Scheduling infrastructure for absolutely everyone
|
|
|
|
The open source Calendly alternative. You are in charge
|
|
of your own data, workflow and appearance.
|
|
|
|
Calendly and other scheduling tools are awesome. It made our lives massively easier. We're using it for business meetings, seminars, yoga classes and even calls with our families. However, most tools are very limited in terms of control and customisations.
|
|
|
|
That's where Cal.com comes in. Self-hosted or hosted by us. White-label by design. API-driven and ready to be deployed on your own domain. Full control of your events and data.
|
|
|
|
## Product of the Month: April
|
|
|
|
#### Support us on [Product Hunt](https://www.producthunt.com/posts/calendso?utm_source=badge-top-post-badge&utm_medium=badge&utm_souce=badge-calendso)
|
|
|
|
<a href="https://www.producthunt.com/posts/calendso?utm_source=badge-top-post-badge&utm_medium=badge&utm_souce=badge-calendso" target="_blank"><img src="https://api.producthunt.com/widgets/embed-image/v1/top-post-badge.svg?post_id=291910&theme=light&period=monthly" alt="Cal.com - The open source Calendly alternative | Product Hunt" style="width: 250px; height: 54px;" width="250" height="54" /></a> <a href="https://www.producthunt.com/posts/calendso?utm_source=badge-featured&utm_medium=badge&utm_souce=badge-calendso" target="_blank"><img src="https://api.producthunt.com/widgets/embed-image/v1/featured.svg?post_id=291910&theme=light" alt="Cal.com - The open source Calendly alternative | Product Hunt" style="width: 250px; height: 54px;" width="250" height="54" /></a> <a href="https://www.producthunt.com/stories/how-this-open-source-calendly-alternative-rocketed-to-product-of-the-day" target="_blank"><img src="https://cal.com/maker-grant.svg" alt="Cal.com - The open source Calendly alternative | Product Hunt" style="width: 250px; height: 54px;" width="250" height="54" /></a>
|
|
|
|
### Built With
|
|
|
|
- [Next.js](https://nextjs.org/)
|
|
- [React](https://reactjs.org/)
|
|
- [Tailwind](https://tailwindcss.com/)
|
|
- [Prisma](https://prisma.io/)
|
|
|
|
## Stay Up-to-Date
|
|
|
|
Cal officially launched as v.1.0 on 15th of September, however a lot of new features are coming. Watch **releases** of this repository to be notified for future updates:
|
|
|
|
|
|
|
|
<!-- GETTING STARTED -->
|
|
|
|
## Getting Started
|
|
|
|
To get a local copy up and running, please follow these simple steps.
|
|
|
|
### Prerequisites
|
|
|
|
Here is what you need to be able to run Cal.
|
|
|
|
- Node.js (Version: >=14.x <17)
|
|
- PostgreSQL
|
|
- Yarn _(recommended)_
|
|
|
|
> If you want to enable any of the available integrations, you may want to obtain additional credentials for each one. More details on this can be found below under the [integrations section](#integrations).
|
|
|
|
## Development
|
|
|
|
### Setup
|
|
|
|
1. Clone the repo into a public GitHub repository (or fork https://github.com/calcom/cal.com/fork). If you plan to distribute the code, keep the source code public to comply with [AGPLv3](https://github.com/calcom/cal.com/blob/main/LICENSE). To clone in a private repository, [acquire a commercial license](https://cal.com/sales))
|
|
|
|
```sh
|
|
git clone https://github.com/calcom/cal.com.git
|
|
```
|
|
|
|
1. Go to the project folder
|
|
|
|
```sh
|
|
cd cal.com
|
|
```
|
|
|
|
1. Install packages with yarn
|
|
|
|
```sh
|
|
yarn
|
|
```
|
|
|
|
1. Use `openssl rand -base64 32` to generate a key and add it under `NEXTAUTH_SECRET` in the .env file.
|
|
|
|
#### Quick start with `yarn dx`
|
|
|
|
> - **Requires Docker and Docker Compose to be installed**
|
|
> - Will start a local Postgres instance with a few test users - the credentials will be logged in the console
|
|
|
|
```sh
|
|
yarn dx
|
|
```
|
|
|
|
#### Development tip
|
|
|
|
> Add `NEXT_PUBLIC_DEBUG=1` anywhere in your `.env` to get logging information for all the queries and mutations driven by **trpc**.
|
|
|
|
```sh
|
|
echo 'NEXT_PUBLIC_DEBUG=1' >> .env
|
|
```
|
|
|
|
#### Manual setup
|
|
|
|
1. Configure environment variables in the `packages/prisma/.env` file. Replace `<user>`, `<pass>`, `<db-host>`, `<db-port>` with their applicable values
|
|
|
|
```
|
|
DATABASE_URL='postgresql://<user>:<pass>@<db-host>:<db-port>'
|
|
```
|
|
|
|
<details>
|
|
<summary>If you don't know how to configure the DATABASE_URL, then follow the steps here to create a quick DB using Heroku</summary>
|
|
|
|
1. Create a free account with [Heroku](https://www.heroku.com/).
|
|
|
|
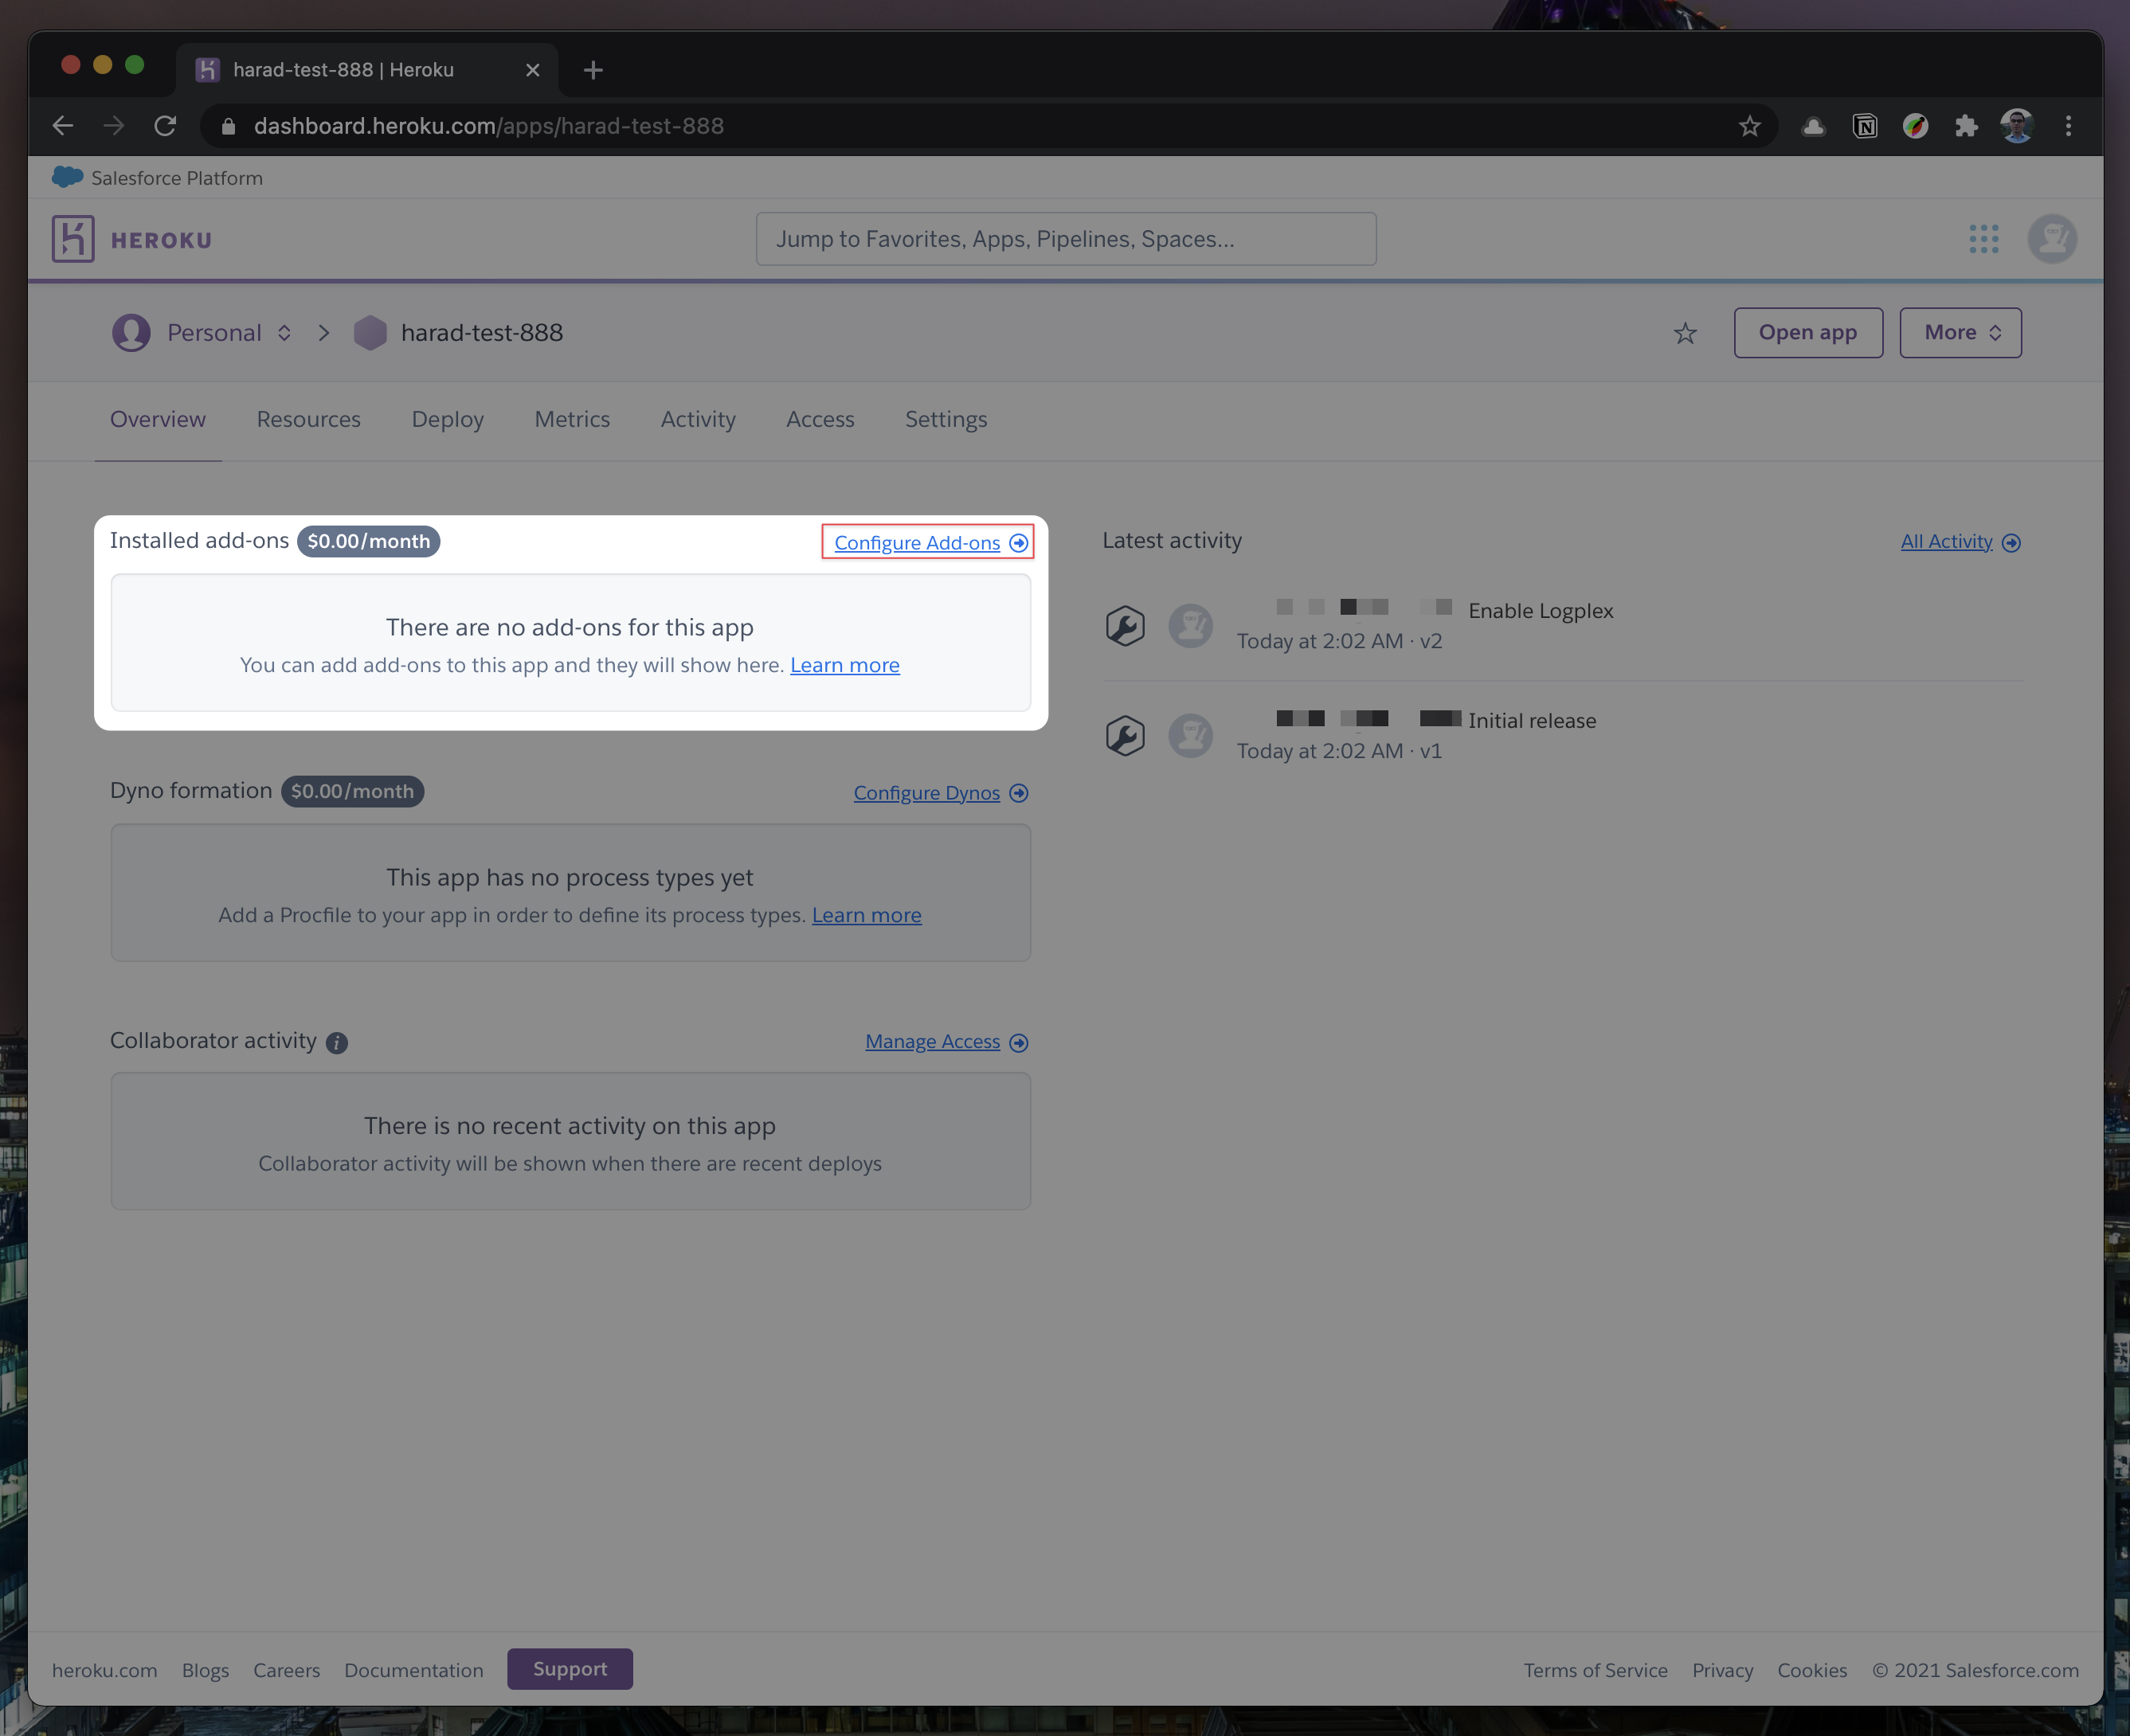
2. Create a new app.
|
|
<img width="306" alt="Create an App" src="https://user-images.githubusercontent.com/16905768/115322780-b3d58c00-a17e-11eb-8a52-b758fb0ea942.png">
|
|
|
|
3. In your new app, go to `Overview` and next to `Installed add-ons`, click `Configure Add-ons`. We need this to set up our database.
|
|
|
|
|
|
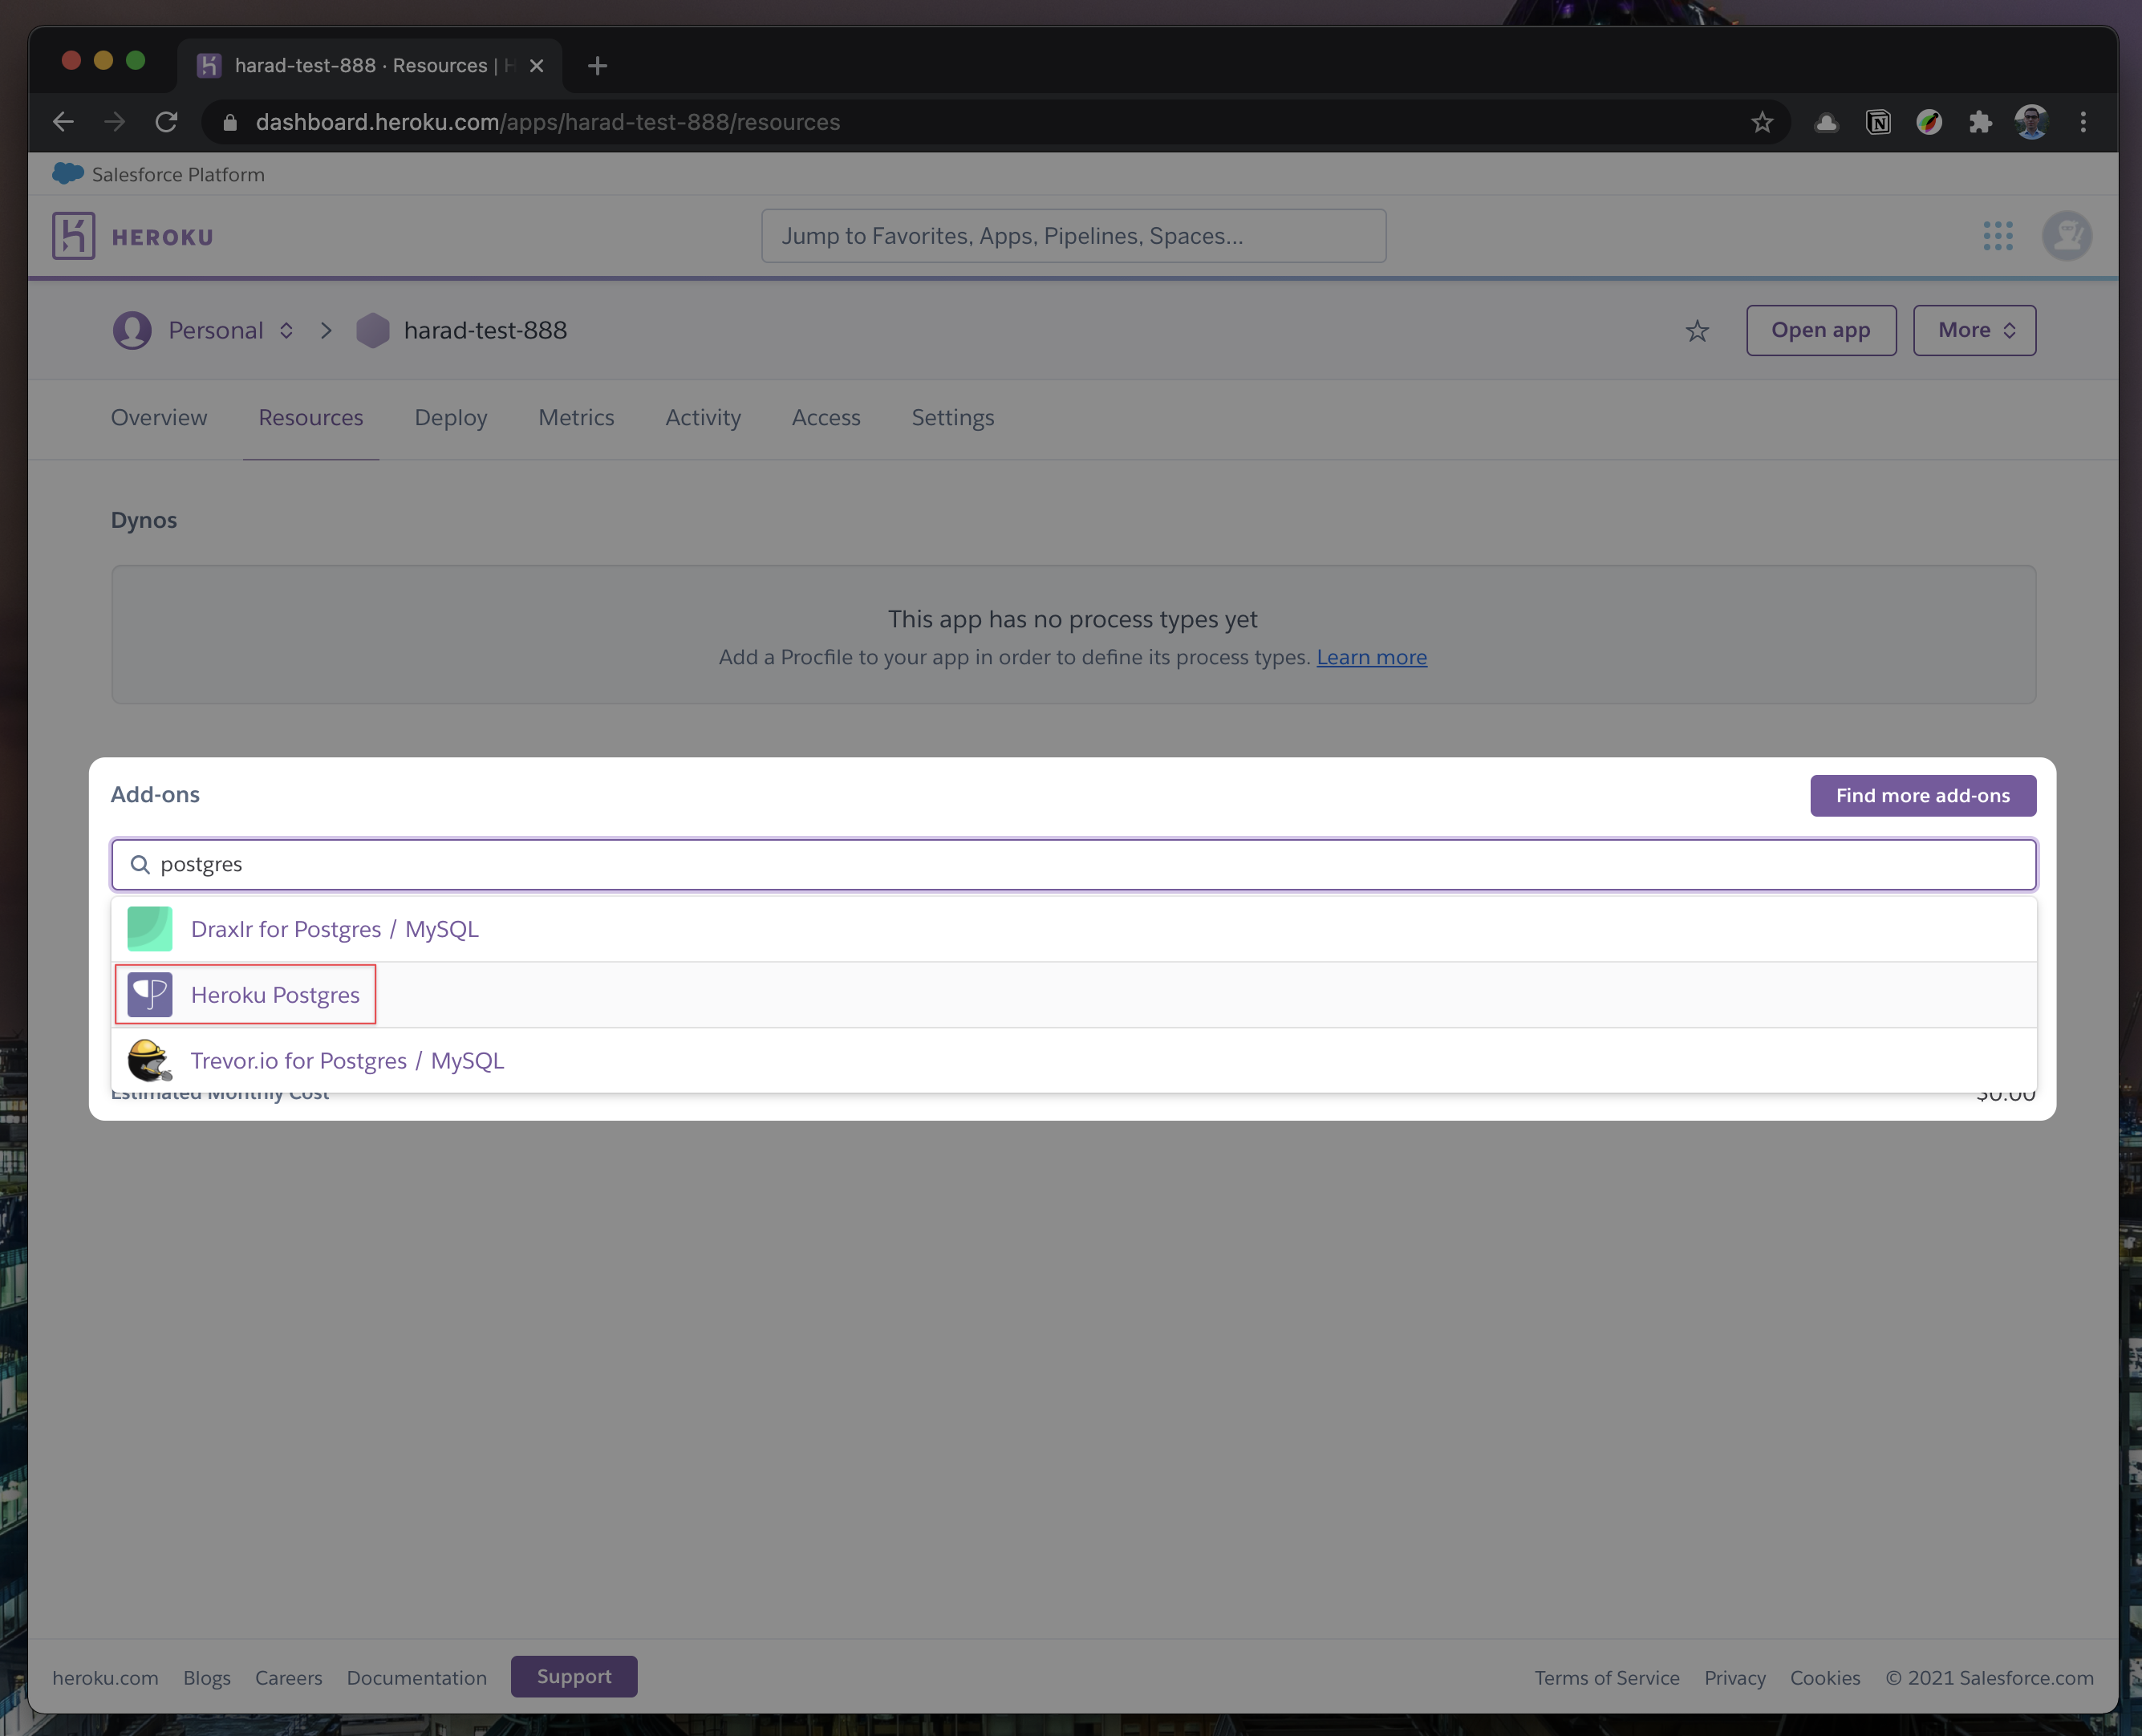
4. Once you clicked on `Configure Add-ons`, click on `Find more add-ons` and search for `postgres`. One of the options will be `Heroku Postgres` - click on that option.
|
|
|
|
|
|
5. Once the pop-up appears, click `Submit Order Form` - plan name should be `Hobby Dev - Free`.
|
|
<img width="512" alt="Submit Order Form" src="https://user-images.githubusercontent.com/16905768/115323265-b4baed80-a17f-11eb-99f0-d67f019aa6df.png">
|
|
|
|
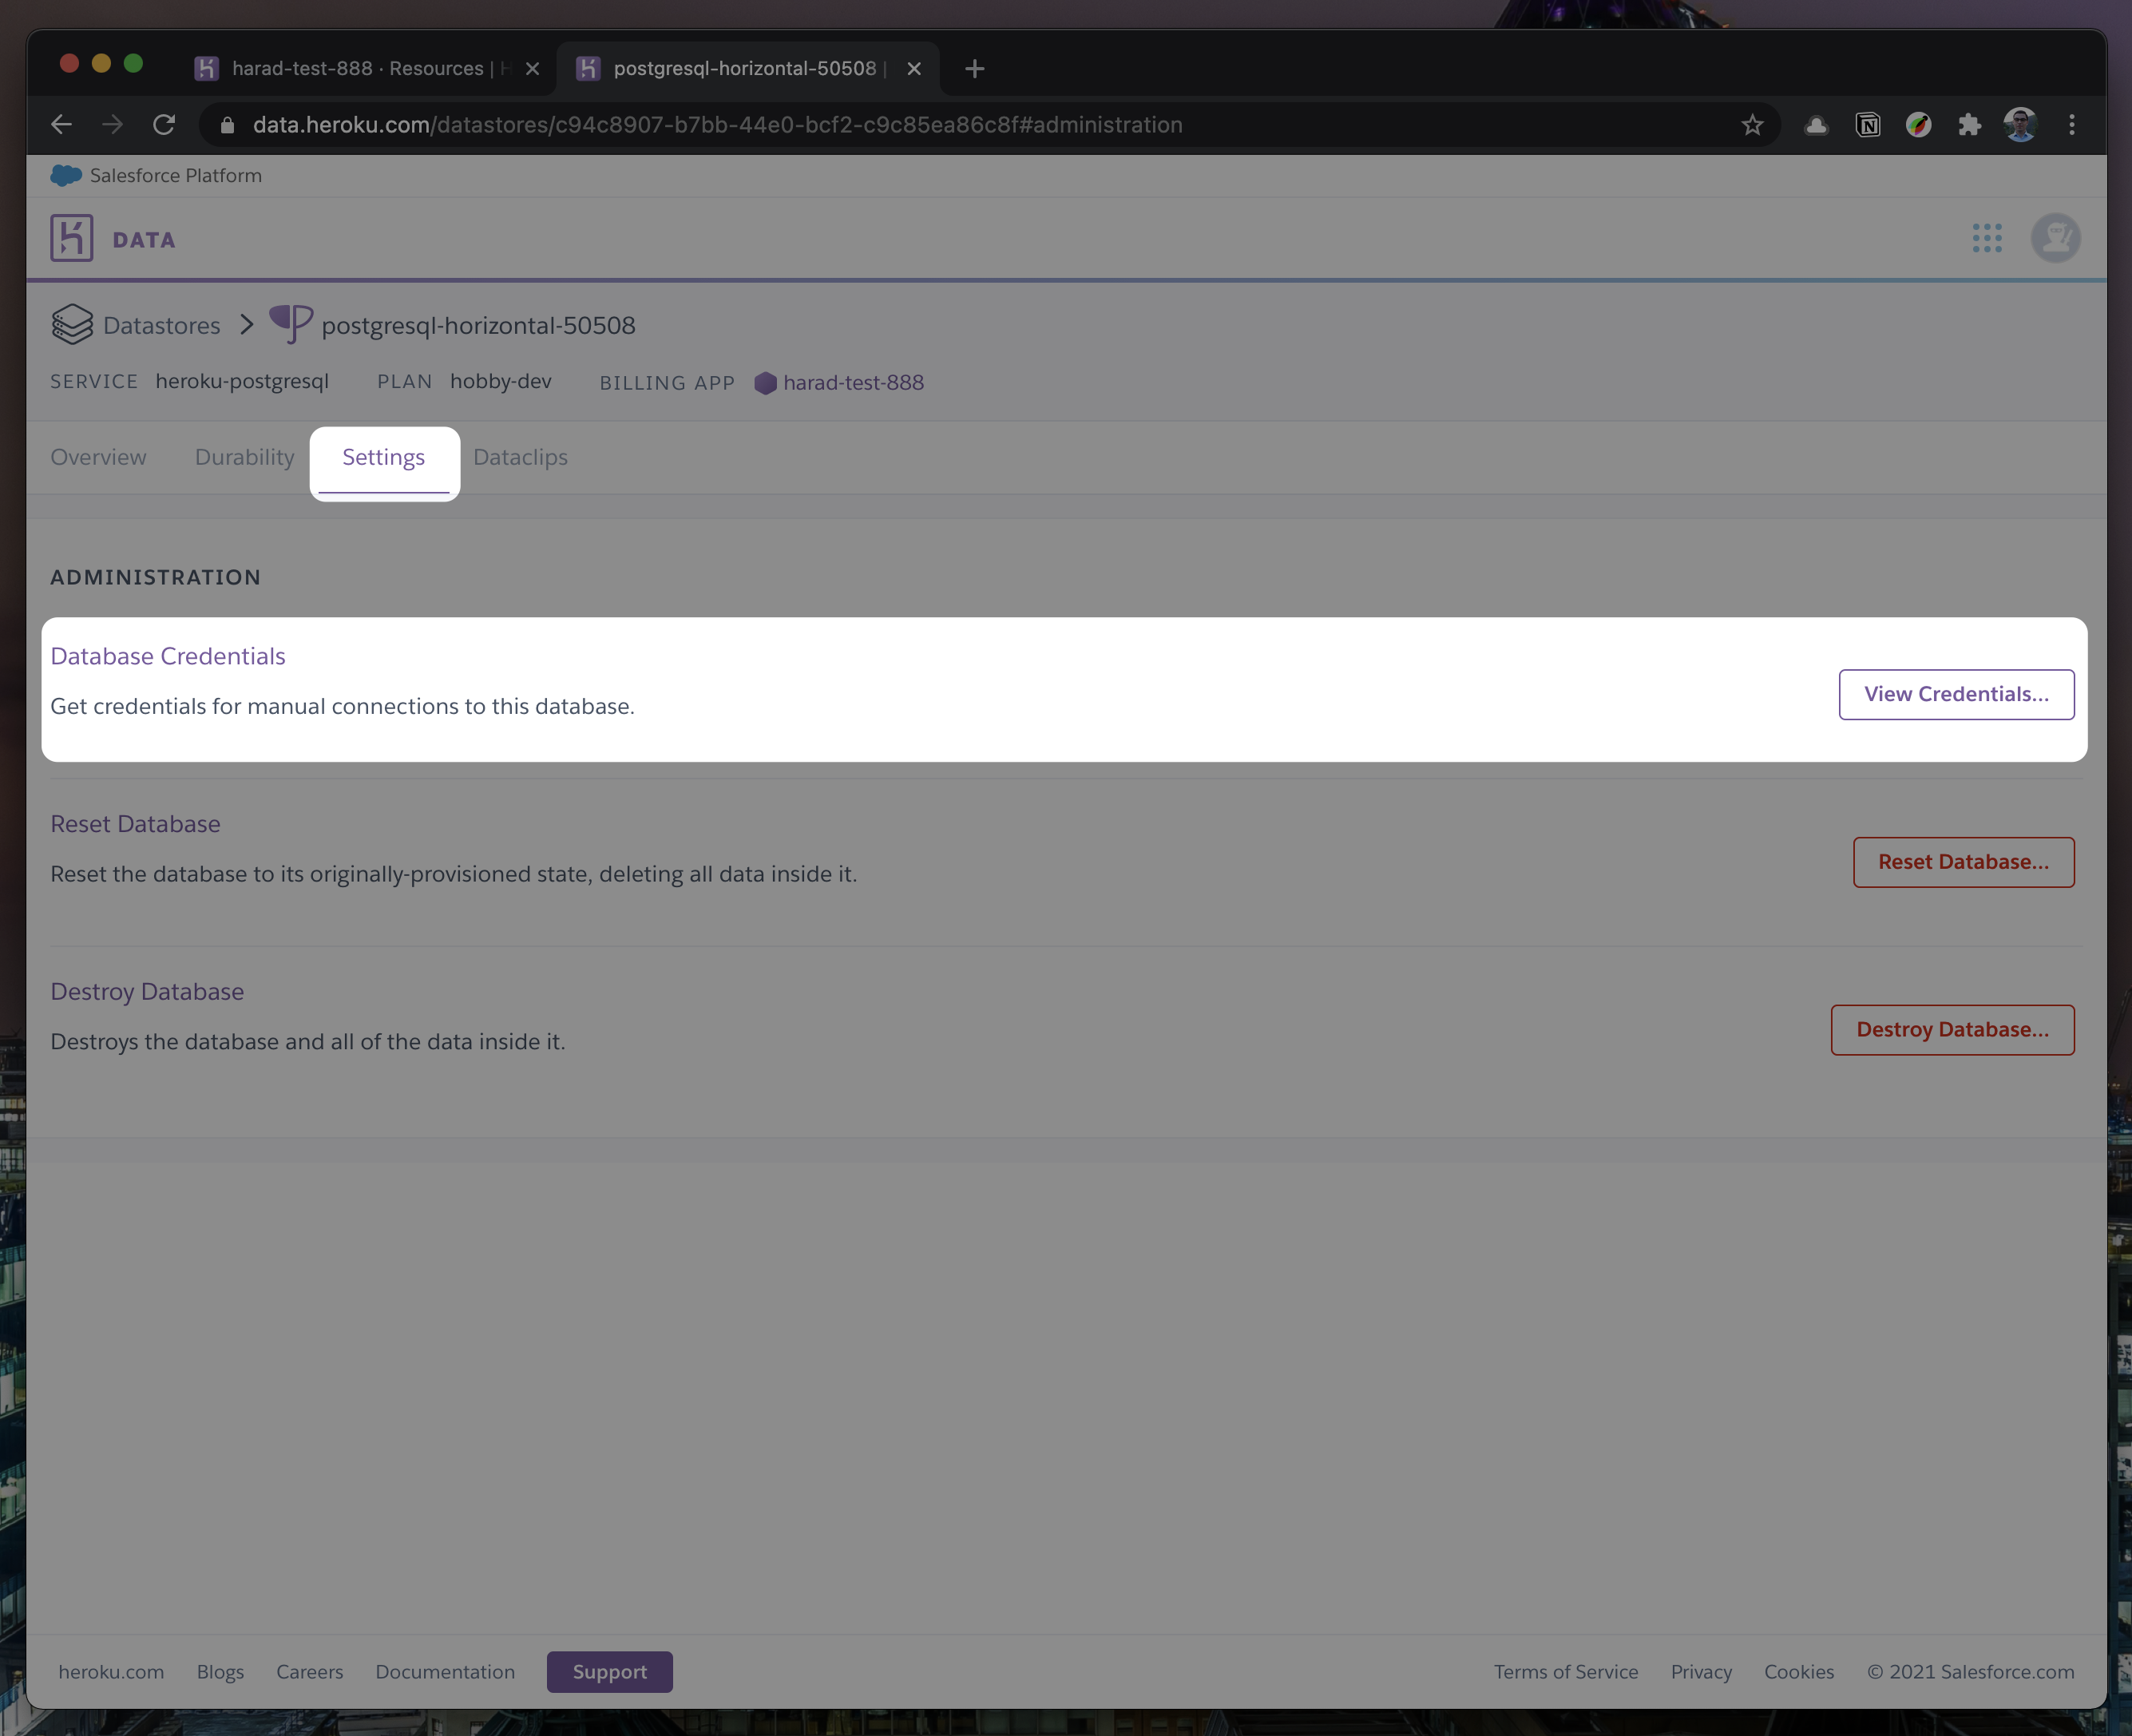
6. Once you completed the above steps, click on your newly created `Heroku Postgres` and go to its `Settings`.
|
|
|
|
|
|
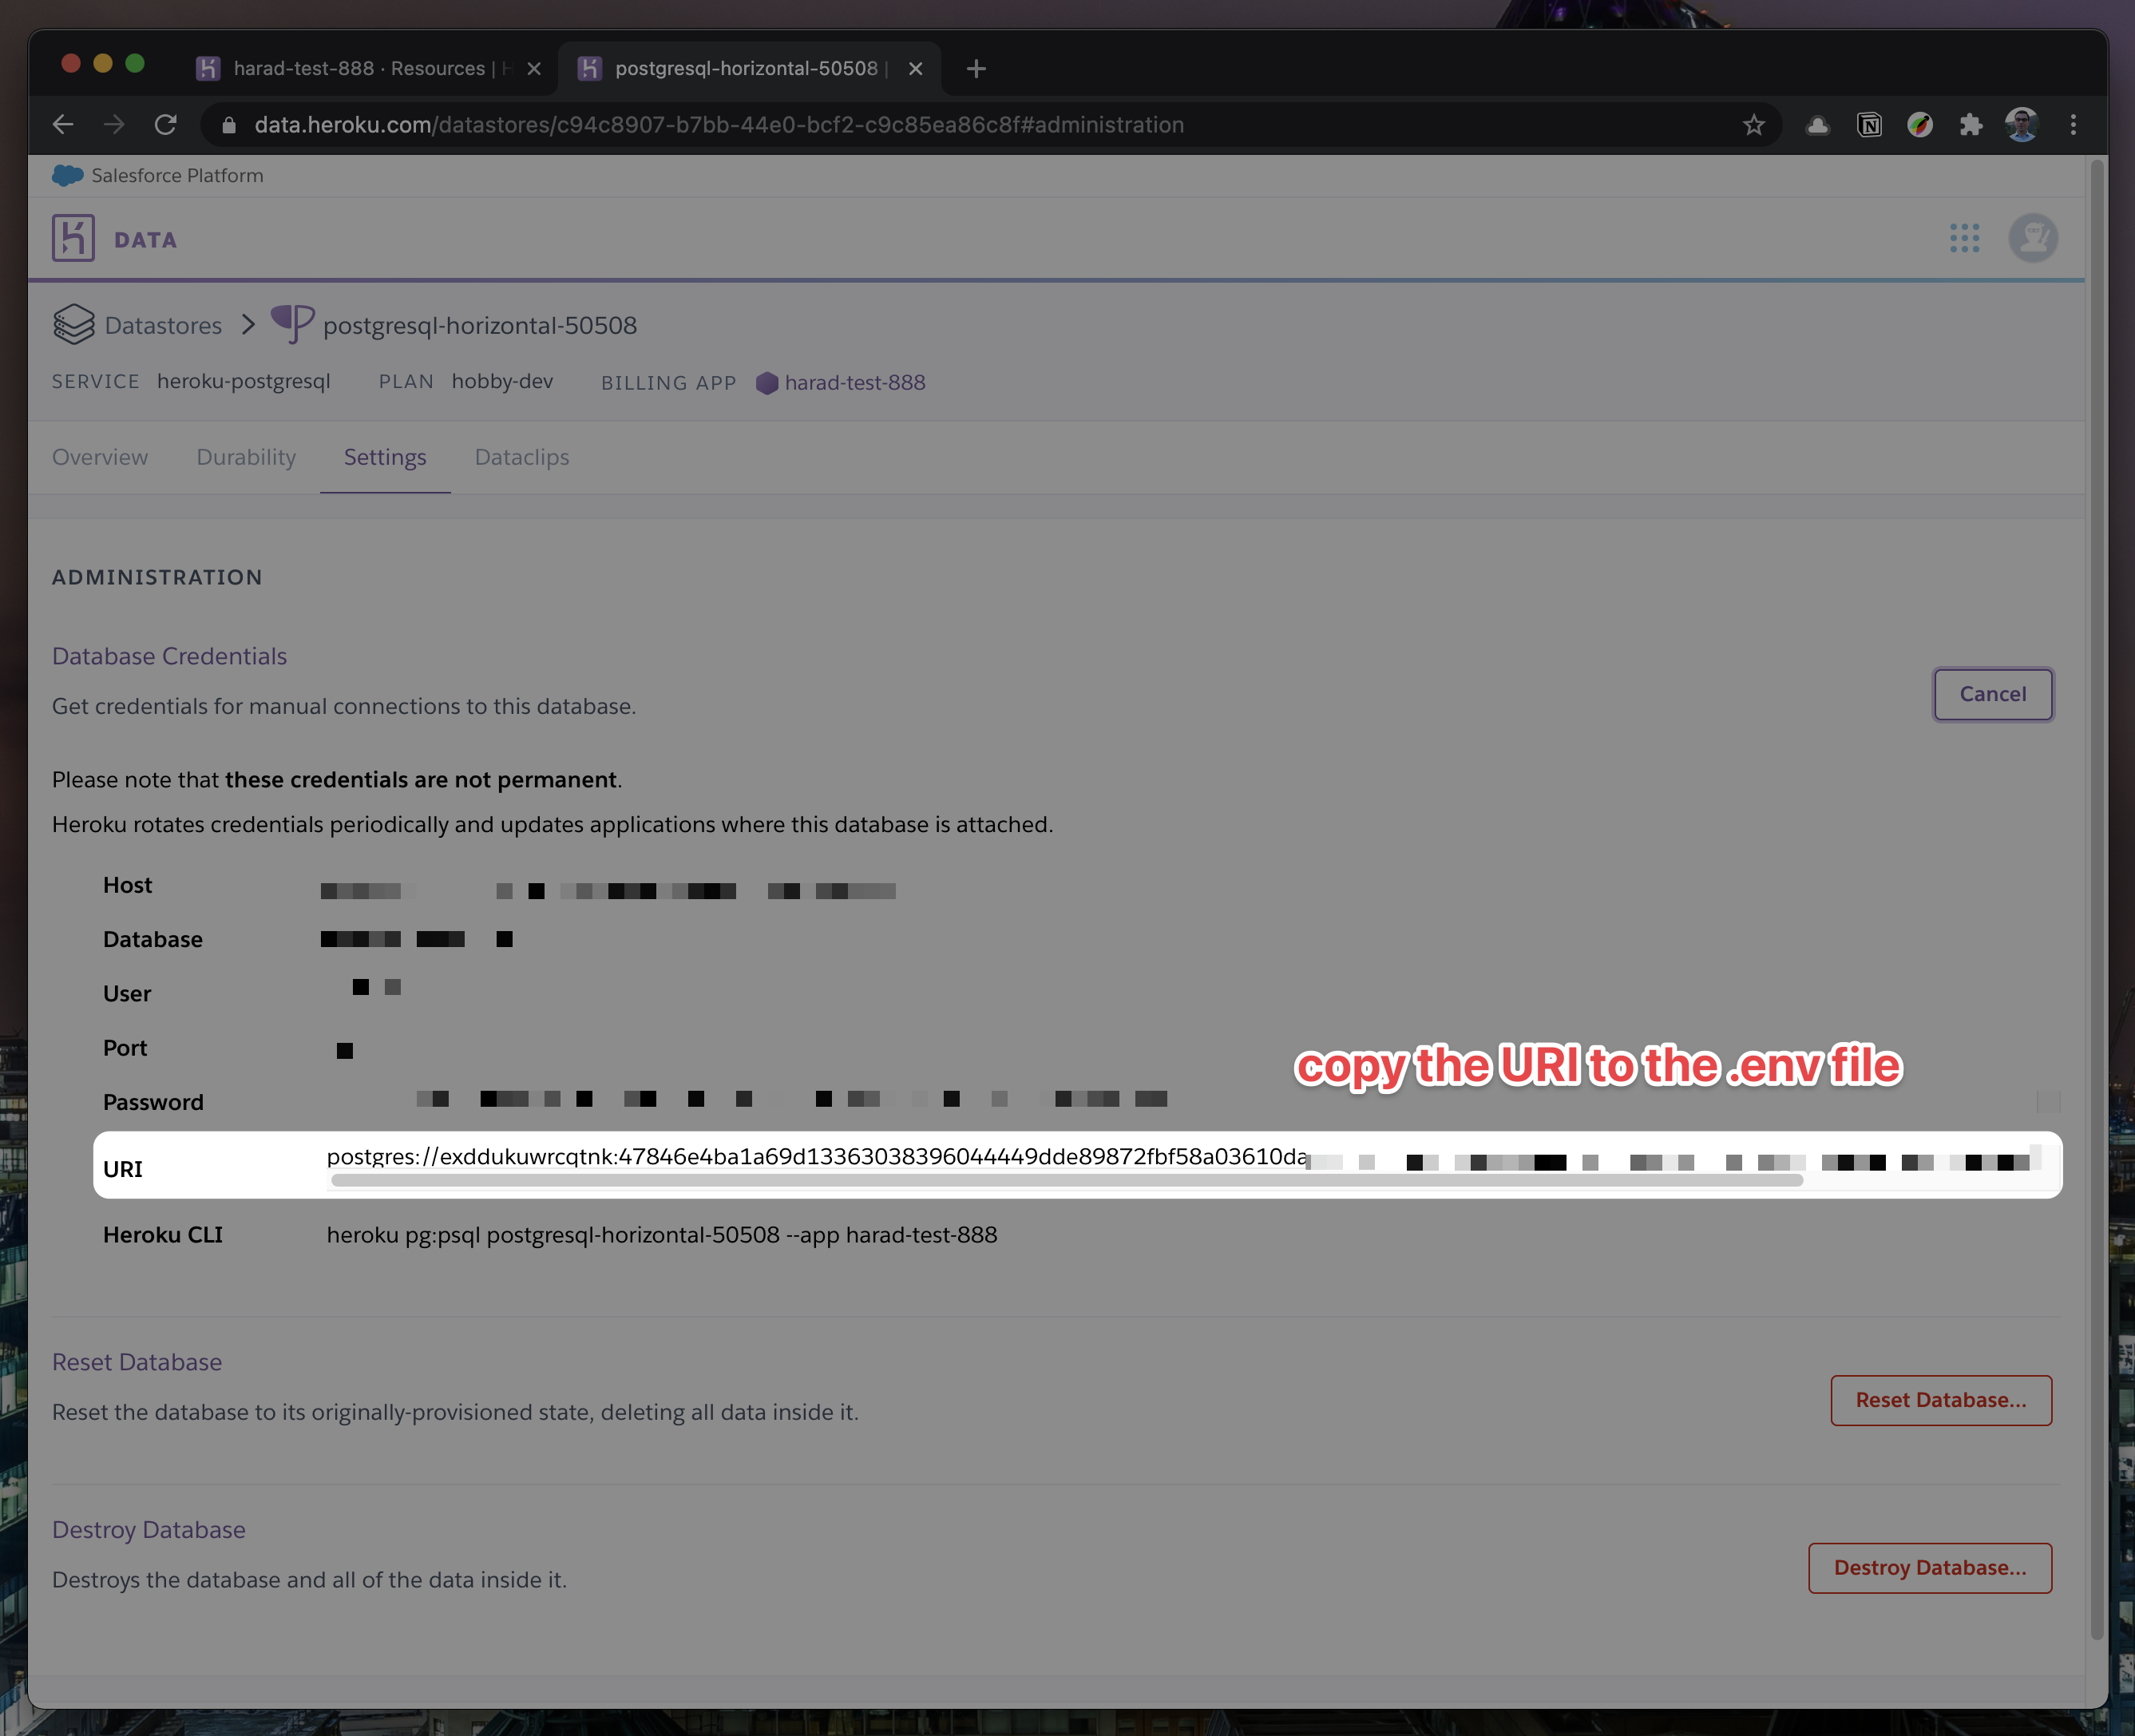
7. In `Settings`, copy your URI to your Cal.com .env file and replace the `postgresql://<user>:<pass>@<db-host>:<db-port>` with it.
|
|
|
|

|
|
|
|
8. To view your DB, once you add new data in Prisma, you can use [Heroku Data Explorer](https://heroku-data-explorer.herokuapp.com/).
|
|
</details>
|
|
|
|
1. Set a 32 character random string in your .env file for the `CALENDSO_ENCRYPTION_KEY` (You can use a command like `openssl rand -base64 24` to generate one).
|
|
1. Set up the database using the Prisma schema (found in `apps/web/prisma/schema.prisma`)
|
|
|
|
```sh
|
|
yarn workspace @calcom/prisma db-deploy
|
|
```
|
|
|
|
1. Run (in development mode)
|
|
|
|
```sh
|
|
yarn dev
|
|
```
|
|
|
|
#### Setting up your first user
|
|
|
|
1. Open [Prisma Studio](https://www.prisma.io/studio) to look at or modify the database content:
|
|
|
|
```sh
|
|
yarn db-studio
|
|
```
|
|
|
|
1. Click on the `User` model to add a new user record.
|
|
1. Fill out the fields `email`, `username`, `password`, and set `metadata` to empty `{}` (remembering to encrypt your password with [BCrypt](https://bcrypt-generator.com/)) and click `Save 1 Record` to create your first user.
|
|
> New users are set on a `TRIAL` plan by default. You might want to adjust this behavior to your needs in the `apps/web/prisma/schema.prisma` file.
|
|
1. Open a browser to [http://localhost:3000](http://localhost:3000) and login with your just created, first user.
|
|
|
|
### E2E-Testing
|
|
|
|
Be sure to set the environment variable `NEXTAUTH_URL` to the correct value. If you are running locally, as the documentation within `.env.example` mentions, the value should be `http://localhost:3000`.
|
|
|
|
```sh
|
|
# In a terminal just run:
|
|
yarn test-e2e
|
|
|
|
# To open last HTML report run:
|
|
yarn workspace @calcom/web playwright-report
|
|
```
|
|
|
|
### Upgrading from earlier versions
|
|
|
|
1. Pull the current version:
|
|
|
|
```sh
|
|
git pull
|
|
```
|
|
|
|
1. Check if dependencies got added/updated/removed
|
|
|
|
```sh
|
|
yarn
|
|
```
|
|
|
|
1. Apply database migrations by running <b>one of</b> the following commands:
|
|
|
|
In a development environment, run:
|
|
|
|
```sh
|
|
yarn workspace @calcom/prisma db-migrate
|
|
```
|
|
|
|
(this can clear your development database in some cases)
|
|
|
|
In a production environment, run:
|
|
|
|
```sh
|
|
yarn workspace @calcom/prisma db-deploy
|
|
```
|
|
|
|
1. Check for `.env` variables changes
|
|
|
|
```sh
|
|
yarn predev
|
|
```
|
|
|
|
1. Start the server. In a development environment, just do:
|
|
|
|
```sh
|
|
yarn dev
|
|
```
|
|
|
|
For a production build, run for example:
|
|
|
|
```sh
|
|
yarn build
|
|
yarn start
|
|
```
|
|
|
|
1. Enjoy the new version.
|
|
<!-- DEPLOYMENT -->
|
|
|
|
## Deployment
|
|
|
|
### Docker
|
|
|
|
The Docker configuration for Cal is an effort powered by people within the community. Cal.com, Inc. does not provide official support for Docker, but we will accept fixes and documentation. Use at your own risk.
|
|
|
|
If you want to contribute to the Docker repository, [reply here](https://github.com/calcom/docker/discussions/32).
|
|
|
|
The Docker configuration can be found [in our docker repository](https://github.com/calcom/docker).
|
|
|
|
### Heroku
|
|
|
|
<a href="https://heroku.com/deploy?template=https://github.com/calcom/cal.com">
|
|
<img width="185px" height="auto" src="https://www.herokucdn.com/deploy/button.svg" alt="Deploy">
|
|
</a>
|
|
|
|
### Railway
|
|
|
|
[](https://railway.app/new/template?template=https%3A%2F%2Fgithub.com%2Fcalendso%2Fcalendso&plugins=postgresql&envs=GOOGLE_API_CREDENTIALS%2CBASE_URL%2CNEXTAUTH_URL%2CPORT&BASE_URLDefault=http%3A%2F%2Flocalhost%3A3000&NEXTAUTH_URLDefault=http%3A%2F%2Flocalhost%3A3000&PORTDefault=3000)
|
|
|
|
You can deploy Cal on [Railway](https://railway.app/) using the button above. The team at Railway also have a [detailed blog post](https://blog.railway.app/p/calendso) on deploying Cal on their platform.
|
|
|
|
### Vercel
|
|
|
|
[](https://vercel.com/new/clone?repository-url=https%3A%2F%2Fgithub.com%2Fcalcom%2Fcal.com&env=DATABASE_URL,NEXT_PUBLIC_WEBAPP_URL,NEXTAUTH_SECRET,NEXTAUTH_URL,CALENDSO_ENCRYPTION_KEY,NEXT_PUBLIC_LICENSE_CONSENT,CALCOM_LICENSE_KEY&envDescription=See%20all%20available%20env%20vars&envLink=https%3A%2F%2Fgithub.com%2Fcalcom%2Fcal.com%2Fblob%2Fmain%2F.env.example&project-name=cal&repo-name=cal.com)
|
|
|
|
<!-- ROADMAP -->
|
|
|
|
## Roadmap
|
|
|
|
<a href="https://cal.com/roadmap"><img src="https://user-images.githubusercontent.com/8019099/176388295-25081ca4-207e-4468-8079-37b195fa8e59.png" alt="Cal.com Roadmap" /></a>
|
|
|
|
|
|
See the [roadmap project](https://cal.com/roadmap) for a list of proposed features (and known issues). You can change the view to see planned tagged releases.
|
|
|
|
<!-- CONTRIBUTING -->
|
|
|
|
## Contributing
|
|
|
|
Please see our [contributing guide](/CONTRIBUTING.md).
|
|
|
|
### Good First Issues
|
|
|
|
We have a list of [good first issues](https://github.com/calcom/cal.com/labels/✅%20good%20first%20issue) that contain bugs which have a relatively limited scope. This is a great place to get started, gain experience, and get familiar with our contribution process.
|
|
|
|
## Integrations
|
|
|
|
### Obtaining the Google API Credentials
|
|
|
|
1. Open [Google API Console](https://console.cloud.google.com/apis/dashboard). If you don't have a project in your Google Cloud subscription, you'll need to create one before proceeding further. Under Dashboard pane, select Enable APIS and Services.
|
|
2. In the search box, type calendar and select the Google Calendar API search result.
|
|
3. Enable the selected API.
|
|
4. Next, go to the [OAuth consent screen](https://console.cloud.google.com/apis/credentials/consent) from the side pane. Select the app type (Internal or External) and enter the basic app details on the first page.
|
|
5. In the second page on Scopes, select Add or Remove Scopes. Search for Calendar.event and select the scope with scope value `.../auth/calendar.events`, `.../auth/calendar.readonly` and select Update.
|
|
6. In the third page (Test Users), add the Google account(s) you'll using. Make sure the details are correct on the last page of the wizard and your consent screen will be configured.
|
|
7. Now select [Credentials](https://console.cloud.google.com/apis/credentials) from the side pane and then select Create Credentials. Select the OAuth Client ID option.
|
|
8. Select Web Application as the Application Type.
|
|
9. Under Authorized redirect URI's, select Add URI and then add the URI `<Cal.com URL>/api/integrations/googlecalendar/callback` replacing Cal.com URL with the URI at which your application runs.
|
|
10. The key will be created and you will be redirected back to the Credentials page. Select the newly generated client ID under OAuth 2.0 Client IDs.
|
|
11. Select Download JSON. Copy the contents of this file and paste the entire JSON string in the .env file as the value for GOOGLE_API_CREDENTIALS key.
|
|
|
|
### Obtaining Microsoft Graph Client ID and Secret
|
|
|
|
1. Open [Azure App Registration](https://portal.azure.com/#blade/Microsoft_AAD_IAM/ActiveDirectoryMenuBlade/RegisteredApps) and select New registration
|
|
2. Name your application
|
|
3. Set **Who can use this application or access this API?** to **Accounts in any organizational directory (Any Azure AD directory - Multitenant)**
|
|
4. Set the **Web** redirect URI to `<Cal.com URL>/api/integrations/office365calendar/callback` replacing Cal.com URL with the URI at which your application runs.
|
|
5. Use **Application (client) ID** as the **MS_GRAPH_CLIENT_ID** attribute value in .env
|
|
6. Click **Certificates & secrets** create a new client secret and use the value as the **MS_GRAPH_CLIENT_SECRET** attribute
|
|
|
|
### Obtaining Slack Client ID and Secret and Signing Secret
|
|
|
|
To test this you will need to create a Slack app for yourself on [their apps website](https://api.slack.com/apps).
|
|
|
|
Copy and paste the app manifest below into the setting on your slack app. Be sure to replace `YOUR_DOMAIN` with your own domain or your proxy host if you're testing locally.
|
|
|
|
<details>
|
|
<summary>App Manifest</summary>
|
|
|
|
```yaml
|
|
display_information:
|
|
name: Cal.com Slack
|
|
features:
|
|
bot_user:
|
|
display_name: Cal.com Slack
|
|
always_online: false
|
|
slash_commands:
|
|
- command: /create-event
|
|
url: https://YOUR_DOMAIN/api/integrations/slackmessaging/commandHandler
|
|
description: Create an event within Cal!
|
|
should_escape: false
|
|
- command: /today
|
|
url: https://YOUR_DOMAIN/api/integrations/slackmessaging/commandHandler
|
|
description: View all your bookings for today
|
|
should_escape: false
|
|
oauth_config:
|
|
redirect_urls:
|
|
- https://YOUR_DOMAIN/api/integrations/slackmessaging/callback
|
|
scopes:
|
|
bot:
|
|
- chat:write
|
|
- commands
|
|
- chat:write.public
|
|
settings:
|
|
interactivity:
|
|
is_enabled: true
|
|
request_url: https://YOUR_DOMAIN/api/integrations/slackmessaging/interactiveHandler
|
|
message_menu_options_url: https://YOUR_DOMAIN/api/integrations/slackmessaging/interactiveHandler
|
|
org_deploy_enabled: false
|
|
socket_mode_enabled: false
|
|
token_rotation_enabled: false
|
|
```
|
|
|
|
</details>
|
|
|
|
Add the integration as normal - slack app - add. Follow the oauth flow to add it to a server.
|
|
|
|
Next make sure you have your app running `yarn dx`. Then in the slack chat type one of these commands: `/create-event` or `/today`
|
|
|
|
> NOTE: Next you will need to setup a proxy server like [ngrok](https://ngrok.com/) to allow your local host machine to be hosted on a public https server.
|
|
|
|
### Obtaining Zoom Client ID and Secret
|
|
|
|
1. Open [Zoom Marketplace](https://marketplace.zoom.us/) and sign in with your Zoom account.
|
|
2. On the upper right, click "Develop" => "Build App".
|
|
3. On "OAuth", select "Create".
|
|
4. Name your App.
|
|
5. Choose "User-managed app" as the app type.
|
|
6. De-select the option to publish the app on the Zoom App Marketplace.
|
|
7. Click "Create".
|
|
8. Now copy the Client ID and Client Secret to your .env file into the `ZOOM_CLIENT_ID` and `ZOOM_CLIENT_SECRET` fields.
|
|
9. Set the Redirect URL for OAuth `<Cal.com URL>/api/integrations/zoomvideo/callback` replacing Cal.com URL with the URI at which your application runs.
|
|
10. Also add the redirect URL given above as a allow list URL and enable "Subdomain check". Make sure, it says "saved" below the form.
|
|
11. You don't need to provide basic information about your app. Instead click at "Scopes" and then at "+ Add Scopes". On the left, click the category "Meeting" and check the scope `meeting:write`.
|
|
12. Click "Done".
|
|
13. You're good to go. Now you can easily add your Zoom integration in the Cal.com settings.
|
|
|
|
### Obtaining Daily API Credentials
|
|
|
|
1. Open [Daily](https://www.daily.co/) and sign into your account.
|
|
2. From within your dashboard, go to the [developers](https://dashboard.daily.co/developers) tab.
|
|
3. Copy your API key.
|
|
4. Now paste the API key to your .env file into the `DAILY_API_KEY` field in your .env file.
|
|
5. If you have the [Daily Scale Plan](https://www.daily.co/pricing) set the `DAILY_SCALE_PLAN` variable to `true` in order to use features like video recording.
|
|
|
|
### Obtaining HubSpot Client ID and Secret
|
|
|
|
1. Open [HubSpot Developer](https://developer.hubspot.com/) and sign into your account, or create a new one.
|
|
2. From within the home of the Developer account page, go to "Manage apps".
|
|
3. Click "Create app" button top right.
|
|
4. Fill in any information you want in the "App info" tab
|
|
5. Go to tab "Auth"
|
|
6. Now copy the Client ID and Client Secret to your .env file into the `HUBSPOT_CLIENT_ID` and `HUBSPOT_CLIENT_SECRET` fields.
|
|
7. Set the Redirect URL for OAuth `<Cal.com URL>/api/integrations/hubspotothercalendar/callback` replacing Cal.com URL with the URI at which your application runs.
|
|
8. In the "Scopes" section at the bottom of the page, make sure you select "Read" and "Write" for scope called `crm.objects.contacts`
|
|
9. Click the "Save" button at the bottom footer.
|
|
10. You're good to go. Now you can see any booking in Cal.com created as a meeting in HubSpot for your contacts.
|
|
|
|
### Obtaining Vital API Keys
|
|
|
|
1. Open [Vital](https://tryvital.io/) and click Get API Keys.
|
|
1. Create a team with the team name you desire
|
|
1. Head to the configuration section on the sidebar of the dashboard
|
|
1. Click on API keys and you'll find your sandbox `api_key`.
|
|
1. Copy your `api_key` to `VITAL_API_KEY` in the .env.appStore file.
|
|
1. Open [Vital Webhooks](https://app.tryvital.io/team/{team_id}/webhooks) and add `<CALCOM BASE URL>/api/integrations/vital/webhook` as webhook for connected applications.
|
|
1. Select all events for the webhook you interested, e.g. `sleep_created`
|
|
1. Copy the webhook secret (`sec...`) to `VITAL_WEBHOOK_SECRET` in the .env.appStore file.
|
|
|
|
<!-- LICENSE -->
|
|
|
|
## License
|
|
|
|
Distributed under the AGPLv3 License. See `LICENSE` for more information.
|
|
|
|
<!-- ACKNOWLEDGEMENTS -->
|
|
|
|
## Acknowledgements
|
|
|
|
Special thanks to these amazing projects which help power Cal.com:
|
|
|
|
[<img src="https://cal.com/powered-by-vercel.svg">](https://vercel.com/?utm_source=calend-so&utm_campaign=oss)
|
|
|
|
- [Vercel](https://vercel.com/?utm_source=calend-so&utm_campaign=oss)
|
|
- [Next.js](https://nextjs.org/)
|
|
- [Day.js](https://day.js.org/)
|
|
- [Tailwind CSS](https://tailwindcss.com/)
|
|
- [Prisma](https://prisma.io/)
|
|
|
|
<a href="https://jitsu.com/?utm_source=cal.com-gihub"><img height="40px" src="https://jitsu.com/img/powered-by-jitsu.png?gh=true" alt="Jitsu.com"></a>
|
|
|
|
Cal.com is an [open startup](https://cal.com/open) and [Jitsu](https://github.com/jitsucom/jitsu) (an open-source Segment alternative) helps us to track most of the usage metrics.
|